
How to Apply Diamonds to Your Canvas: A Beginner's Tutorial
Diamond painting is a relaxing and enjoyable pastime that results in lovely and creative artwork using colored diamonds. If you are starting with diamond painting and applying your diamonds on the canvas for the first time you may be confused or overwhelmed. Don't worry - this beginners' guide will help you understand each step from preparing your canvas and tools, to placing the diamonds and correcting any mistakes along the way. Whether you are trying to produce a beautiful piece of decor for your living room, or you are simply looking for a relaxing hobby for yourself, this step-by-step guide will help you be successful and get your shiny artwork onto the canvas!
1. Get Your Diamond Painting Tools Ready
Before attaching the diamonds to the canvas, it’s important to gather the must-have tools and accessories. Most diamond painting kits come with everything you need, including:
- Premium Adhesive Canvas (With poured glue and HD symbols)
- Color Coded Diamond Drills (Sorted in labeled baggies)
- Magic Diamond Applicator with Grip (1, 4 and 9 placer heads)
- Wax Pad (Used to pick up diamonds with the diamond pen)
- Diamond Tray (Shake lightly to sort your diamonds)
- Tweezers (Used for precised diamond application)
- Zip Lock Bags (For diamond storage)
- Printed Instructions (For more tips and tricks)
Taking a few minutes to set up your space and tools will make the process more enjoyable—and help you stay focused on the fun part: making your canvas sparkle!

2. Mastering the Canvas and Keeping It Clean
- How to read the canvas symbols and legend
The canvas is the heart of your diamond painting, and getting familiar with it is key before placing your first gem. When you open your kit, you’ll notice that the canvas is pre-printed with a color-coded chart, much like a cross-stitch pattern. Each tiny square has a symbol corresponding to a specific diamond color—this is your guide.
Along the sides or bottom of the canvas, you’ll find a legend or key. This chart matches each symbol to a number or DMC code and tells you which colored drills to use. Take a moment to study it—it’s like your treasure map!
- How to Use Parchment Paper in Diamond Painting
First, cut the parchment paper into small, workable squares or rectangles. This allows you to cover just the areas you’re not currently working on. Second, peel back a portion of the original plastic cover from your canvas, then gently place a piece of parchment paper over that section. Be sure it lies flat and doesn’t wrinkle. Finally, work one section at a time, peeling away the parchment piece as you go. This helps keep dust, hair, and dirt off the sticky surface.
Once you’re done for the day, use parchment paper to cover any exposed adhesive instead of replacing the original plastic. It’s easier to remove and reapply.

3. Preparing to Paint with Diamonds
Once you’re familiar with your canvas, it’s time to get those diamonds ready!
Start by choosing a symbol from the section of the canvas you’ll be working on. Then, find the matching diamond color using the legend on the side of the canvas.
Fill with a small quantity of the appropriate drills into the grooved tray. Gently shake the tray from side to side—this turns the diamonds upside down and stacks them well so they are easy to pick up.
Second, using your diamond pen, press the tip of the pen into the wax pad that comes with your kit. The wax helps the pen grip diamonds. After loading a tiny bit of wax, press the tip of the pen gently onto the top of a diamond—it should stick smoothly.
Now you’re ready to place it on the canvas! It’s a simple, soothing process—just like painting, but with sparkling gems instead of brushes.
Tips:Keep your workspace clutter-free and your drills organized in small labeled containers. This helps you find colors quickly and stay focused.

4. Applying the Diamonds
Now for the fun part—placing your diamonds! With your pen loaded and a drill ready, gently press the diamond onto the matching symbol on the canvas. The sticky surface will hold it in place with no extra glue needed. Don’t worry about perfect alignment—most drills will naturally fall into a grid, and small adjustments can be made as you go.
If a diamond is off-center, use the pen or a pair of tweezers to nudge it into position.Try not to press too hard—just a light touch is enough. Over time, your canvas will begin to shimmer with color and texture, piece by piece. It’s incredibly satisfying to see the design come to life as you add each sparkling gem!
Tips:Good lighting is essential—a bright desk lamp or LED light pad can help you see the tiny symbols clearly and reduce eye strain.

5. Fixing Common Mistakes
Even the most careful diamond painters run into a few hiccups—but don’t worry, most issues are easy to fix!
- If your wax isn’t picking up diamonds well, it may be time to reload it. Just press your peninto the wax pad again until the tip is filled.
- If you accidentally place a diamond in the wrong spot, gently remove it with tweezers or the edge of the pen. Don’t force it—take your time and reposition it correctly.
- For crooked or uneven drills, use a straight edge, such as a ruler or credit card, to gently press and align them. A roller can also help flatten and secure drills evenly.
- If drills are popping off, make sure you’re pressing them down firmly. You can lay a heavy book over the finished section to help them adhere better.
Diamond painting is forgiving—mistakes are just part of the creative journey!
6. Finishing and Displaying Your Artwork
Once you’ve placed the final diamond, to make sure all the drills are firmly in place, lay a protective sheet (like parchment paper over your canvas and gently press down using a rolling pin or a heavy book. This helps secure the diamonds and smooth the surface.
If you want extra durability, consider using a sealer made for diamond paintings—it locks the drills in place and adds a subtle sheen. Just be sure your canvas is finished and clean before applying.
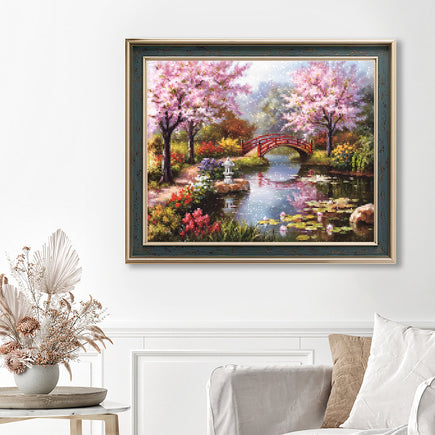
Now it's time to display your work! You can frame your painting and hang it. Whether as a gift or as part of your home decor, your finished diamond painting will shine with pride - and your personal touch will make it shine even more.

Stick and Sparkle Your Way to Fun
This blog is a step-by-step guide designed to help beginners start their diamond painting journey with confidence. There are instructions for preparing tools, reading the canvas, accurate diamond placement, correcting common mistakes, and so on. The tutorial will provide helpful tips and reminders for clicking in the diamonds to the canvas, with the goal of allowing you to create effectively and ultimately finish a wonderful diamond painting without stress.
It makes the whole process simple, easy, and fun, perfect for beginners who want to easily create a stunning and sparkling masterpiece.