Up Your Art Game With Diamond Painting Tricks, Tips, And Hacks

Diamond painting is a lovely, relaxing and rewarding hobby but like any craft there are always ways to make it even more enjoyable and efficient. Whether you're just starting or have already completed a gallery full of sparkly masterpieces, this guide is packed with tips, tricks, and hacks to help you level up your diamond art game. Get ready to dazzle with these crafty secrets!
1. Organize Your Workspace Like a Pro
A tidy workspace is everything. Use small containers to separate your drills by color and label them with the corresponding code. Invest in a multi-compartment storage box to keep everything neat and within reach. The less time you spend looking for the right color the more time you can spend placing those sparkly gems!
Pro tip: Lay a light-colored cloth or towel under your project to catch any stray drills. It makes cleaning up so much easier and prevents losing those tiny treasures.

2. Be Comfortable for Long Sessions
Diamond painting can be addictive—hours can fly by and you won't even notice! Make sure you have a comfortable chair and a supportive cushion to avoid back or neck pain. If your table is too low, consider placing something sturdy, like a dictionary, under your canvas to bring it up to a comfortable height. You might also want to invest in an adjustable LED light pad to see the symbols on the canvas and reduce eye strain. Good lighting is a game changer, especially for intricate designs.
3. The Multi-placer Tool: Your New Best Buddy or a Bit Tricky?
If you're working on a large area of the same color, the multi-placer tool is your best friend. Practice with it on a smaller section until you feel comfortable. It will save you so much time, but it does take a bit of getting used to. Start with a smaller multi-placer, like a 3 or 4-drill tip, before moving on to the bigger ones.
Pro tip: Apply a little extra wax when using a multi-placer to ensure the drills stick evenly. And remember—practice makes perfect!
4. Go Big!
If you're comfortable, consider working with a larger canvas. Bigger canvases mean more room for intricate details, resulting in stunning, highly detailed artwork that truly stands out. Larger diamond paintings can be more challenging, but they are also incredibly rewarding. Don't be afraid to go big and see the difference it makes!
5. Keep Your Trays!
Don't throw away those plastic trays that come with your diamond painting kits! They are incredibly useful for sorting and organizing drills, and they can be repurposed for other crafts or projects involving small parts. Keeping the trays will make your workspace more efficient, and once you have enough, you can even dedicate a tray to each color on the canvas, making the process smoother and more organized.
6. Oops! Here's How to Fix It.
Even the most careful crafters make mistakes. If you accidentally place a drill in the wrong spot, use a pair of tweezers to gently remove it. For larger mistakes, you can use a piece of washi tape to lift multiple drills without damaging the adhesive layer.
Even the most careful crafters make mistakes. If you accidentally place a drill in the wrong spot, use a pair of tweezers to gently remove it. For larger mistakes, you can use a piece of washi tape to lift multiple drills without damaging the adhesive layer. And the best part? Every Diamond Painting Pro's all-inclusive kit comes with a handy tweezers, ensuring you have the right tools to fix any oopsies with ease!
Pro tip: For extra security, keep a roll of washi tape on the edges of your canvas to protect the adhesive from dust and lint while you're working.

7. Keeping Your Drills Static-Free
Static can be a real nuisance when handling diamond drills. To combat this, add a tiny piece of dryer sheet to your storage containers. It helps to reduce the static electricity that makes drills stick together or jump out unexpectedly.
Another great hack: rubbing a small amount of baby powder inside the container can also work wonders for reducing static.
8. The Rolling Pin Finish
After you've placed the final drill on your canvas, it's time to seal the deal! Use a rolling pin to gently press down on your finished piece. This ensures every drill is firmly in place and flush against the canvas. Be sure to place a cloth over the artwork first to protect the drills from scratches.
9. Seal Your Masterpiece
Once you've completed your work, sealing your diamond painting can keep those drills locked in and maintain the sparkle for years to come. Look for a clear, non-yellowing sealant specifically made for diamond arts or craft projects. Apply it evenly across the canvas for the perfect finish.
10. Turn Your Diamond Painting into Wall Art
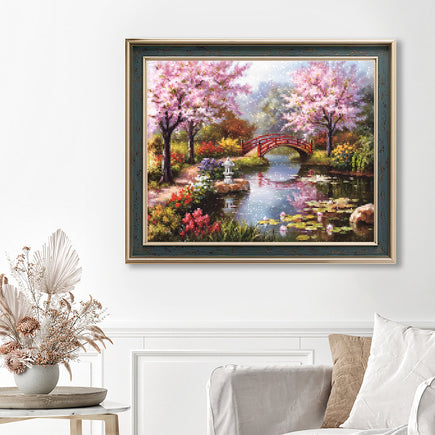
After all that hard work, it's time to show off your masterpiece! You can frame it in a way that suits your style. Use a canvas stretcher frame for a more modern look, or simply tape it to a foam board for a lightweight display option.

11. Make It Social
Why not make your diamond painting sessions a social affair? Gather friends for a craft night or join an online community to share your progress. Seeing others' work can be incredibly inspiring, and sharing tips can elevate everyone's skills. Plus, it's just plain fun to enjoy the sparkle together!
12. Take Care of Yourself
Paint with diamonds can be so much fun that you lose track of time, but it's important to take care of yourself while you create. Remember to take regular breaks—stand up, stretch, rest your eyes, or even take a moment to grab a cup of coffee or tea. Short breaks help you stay refreshed and prevent stiffness. Staying comfortable and healthy while creating ensures you can keep enjoying your craft. A happy artist makes the best art, after all!
With these tips, tricks, and hacks, you're all set to take your diamond art painting to the next level. Remember, the key to mastering any craft is patience, practice, and above all, enjoying the process. So grab your favorite canvas, settle in with a cup of tea, and get ready to create your next sparkling masterpiece!


