
Diamond Painting 101: A Step-by-Step Guide to Creating Sparkling Masterpieces

Hey there, creative soul! Are you ready to embark on a colorful journey filled with sparkle and joy? Look no further because we've got you covered! In this step-by-step diamond painting guide, we'll take you by the hand and show you how to dive into the wonderful world of diamond painting. Consider this tutorial as the kick-start to our series, where more detailed tips and tricks await you in our upcoming posts! Get ready to unleash your inner artist and create dazzling masterpieces that will make your heart skip a beat!
What is Diamond Painting?
Let's start off by answer two questions that many people are wondering: What exactly is diamond painting? Is Diamond painting good for you? Well, diamond painting is not only an enjoyable activity but also an incredibly creative and therapeutic endeavor. It's a mix of cross-stitch and paint-by-numbers, where instead of stitching or painting, you're applying tiny resin "diamonds" to a coded adhesive canvas. These gems create a sparkling masterpiece as you build your artwork one diamond at a time.
But diamond painting is so much more than a simple craft project. It offers a range of benefits that make it appealing to people of all ages and skill levels:
- Stress Relief and Mindfulness: In today's fast-paced world, finding activities that help calm the mind is essential. 5D diamond art offers a unique way for you to unwind and escape daily stress. Placing each shiny diamond drill onto the canvas is rhythmic and soothing, helping you focus on the present moment and forget all your worries. This repetitive, mindful process can have a meditative effect, helping you reduce anxiety, clear your mind, and find inner peace.
- A Creative Outlet for Everyone: You don't need to be an experienced artist to enjoy diamond painting—anyone can do it! The all-inclusive diamond painting kit has everything you need to get started, including the pre-printed canvas that comes with easy-to-follow symbols and a color-coded guide, making it simple to create a stunning piece of art. Whether you're a beginner or seasoned crafter, diamond painting offers a fun and low-pressure way to get creative.
- Therapeutic Benefits: Beyond creativity, diamond painting also provides therapeutic benefits. Engaging in this calming craft promotes a "flow state", allowing you to immerse yourself fully in the activity. This boosts concentration, reduces fatigue, and improves your mood. Studies show that creative activities like diamond painting can alleviate symptoms of anxiety and depression, making it an ideal hobby for mental well-being.
- A Fun and Bonding Activity: Diamond art is not just a solo activity—it's perfect for sharing with friends, family, or kids. Whether you're hosting a craft night or spending quality time together, diamond art painting brings people closer as they bond over a shared creative experience.
- The Satisfaction of Completion: One of the best parts of diamond painting is the incredible sense of accomplishment you feel when you finish your project. Each completed piece is a sparkling reminder of your patience, creativity, and dedication. Plus, it makes for a beautiful decoration or heartfelt gift.

How To Start Your First Diamond Painting
Step 1: Gather Your Shiny Supplies
Alright, let's kick off this diamond painting adventure by gathering all the essentials! Our all-inclusive diamond painting kit is your treasure trove for this creative extravaganza. Inside, you'll find everything you need: a pre-adhesive canvas, vibrant 5D resin diamond drills, a sorting tray for diamond drills, a diamond applicator pen with multi-placer heads, along with a wax pad and tweezers for those intricate details. And of course, set the mood with your favorite tunes and a refreshing beverage to keep those creative vibes flowing!
Step 2: Unveil the Canvas Magic
Now, it's time to unveil the enchanting magic hidden within your canvas! Carefully unroll it on a smooth surface, feeling the excitement build with each unfolding moment. Once rolled out, peel back a small portion of the protective film to reveal the sticky surface beneath, but keep the rest covered to prevent any dirt or dust from getting onto the canvas.
If you'd like to take your crafting experience up a notch, you can also prepping your canvas with parchment paper. To keep your canvas clean and organized while working on smaller sections, these double-sided non-stick parchment paper works like a charm! Simply replace the protective film with parchment papers, you can use it in it's A4 size or cutting it into manageable strips or squares to cover the canvas. This allows you to reveal and work on only the parts you're focused on without exposing the entire sticky surface. It's a great way to keep your workspace neat and prevent dust, pet hair, or even yourself from sticking to the canvas!
Step 3: Crack the Code of Symbols
Now, let's unravel the secret language of symbols! Your canvas is pre-printed with an array of HD-printed symbols, each representing a different diamond color. Don't worry, it's easier than learning a secret handshake. Simply refer to the legend conveniently printed on the side of your canvas, then match the corresponding color of diamonds to the symbols. Dive in like a detective on a mission, and soon you'll be a symbol-cracking pro!
Then you choose a single color diamond to get started with. Pour a small amount of diamonds in the tray, hold the tray at a slight angle and gently shake it back and forth. The diamonds will settle with the flat side down, and faceted side up, making them easier to pick up with your applicator.
Step 4: Pop, Place, and Pop Some More
Now comes the fun part—time to let those diamonds sparkle! Take your trusty diamond applicator and dip it into the wax pad. Just a small dab is all you need, like a high-five with a sticky friend! The wax helps the diamonds stick to the applicator so you can easily pick them up and place them on the canvas.
To start, use the single placer tip to pick up one diamond at a time, flat side up, and bring it to its matching symbol on the canvas. Gently press it down, and—voilà!—your first diamond is in place. Feel the satisfaction of each click as the gems snap into their spots.
Want to give your drilling experience a spin? Use the multiplacer tool to pick up several diamonds at once and fill larger areas with matching colors in no time! Just line up the diamonds in your tray, press the multi-placer head into a row of diamonds, and pop them into place on the canvas in one go. It's a great way to keep the flow going when you're working on bigger sections.
Keep popping, placing, and popping some more, allowing your masterpiece to blossom one shiny gem at a time. Let the soothing rhythm of placing diamonds pull you into a creative flow as your artwork comes to life with each sparkling touch.
Step 5: Bask in the Glory of Your Creation
Oh, sweet victory! Take a step back and admire your incredible progress. Marvel at the vibrant colors and sparkling magic you've brought to life. To ensure your diamonds are snug as a bug in a rug, give the canvas a gentle massage with your hands or roll a rolling pin over it—hello, ultimate ASMR! If you spot any stray diamonds, gently nudge them back into place with the tip of your applicator.
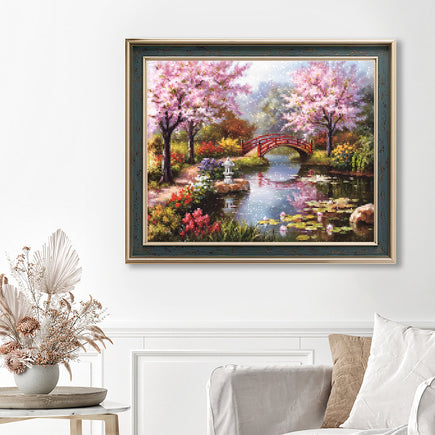
Now that your masterpiece is complete, it's time to think about how to showcase it! Why not frame your artwork and turn it into a stunning piece of home decor? A chic frame will protect your diamonds and keep them sparkling for years to come. Whether you hang it in your living room, bedroom, or home office, your diamond painting is sure to catch eyes and start conversations.
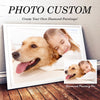
Looking for the perfect gift? A personalized custom diamond painting makes a thoughtful, handmade present that's bursting with creativity and love. Whether it's a family portrait, pet photo, or a scenic landscape, it's the kind of personal, heartfelt gift that will leave a lasting impression. Wrap it up, add a personal note, and watch their face light up when they see your sparkling creation!
Whether you choose to frame it, gift it, or keep it as your own sparkly treasure, you've created something truly magical. You should feel proud of the dazzling masterpiece you've brought to life, and the journey you took to get there.

Common Mistakes & How to Avoid Them
Getting into diamond painting is exciting, but it's easy to run into a few bumps along the way. Fear not, though, for we're here to guide you with some invaluable insights on sidestepping these blunders and ensuring your masterpiece truly shines.
- Not Using Enough Wax: Make sure there's enough wax on the applicator to help the diamonds stick. Too little wax can make it harder to place the diamonds accurately.
- Prepping the Canvas Incorrectly: Avoid exposing too much canvas at once, this prevents any kind of dust or pet hair from sticking.
- Getting Overwhelmed by Complex Designs: For anyone who's new to this hobby, you can always start with smaller, simpler designs before moving on to more intricate projects.
- Placing Diamonds on the Wrong Symbol: Always double-check your symbols before placing the diamonds. Occasionally step back and take a look at the entire canvas. This way, you'll easily spot any misplaced colors and keep your masterpiece on track.
- Letting Pets Too Close to the Canvas: Keep your fur babies at a safe distance!
- Not Wiping Down Your Painting Before Sealing: Before sealing your finished painting, make sure to wipe it down to remove any dust or debris. This step helps prevent imperfections in the final sealed piece.

Must-Know Tips and Tricks When Starting Diamond Painting
If you're new to diamond painting, get ready to shine with these super handy diamond painting tips! These following tips and tricks will help you sparkle as you become a diamond painting pro in no time!
1) Maintain Cleanliness
A clean workspace is essential for a successful diamond painting experience. Dust and debris can stick to the adhesive on the canvas, making it difficult for the diamonds to stay in place. Always make sure your workspace is tidy and free of any dirt before you begin.
2) Prepping Before Starting
Prepping ahead of time will save you from unnecessary stress later! Organizing your kits and tools before you begin can speed up your progress and keep everything neat.
For Diamonds: It's best to use diamond painting storage containers that keep each color organized and easily accessible. This prevents you from scrambling for the right color and ensures a more relaxed crafting experience. After you're done, leftover diamonds can be stored for future art and craft projects.
For Canvases: Invest in a parchment paper set to protect your canvas from dust and keep it smooth while you work. These non-stick, double-sided parchment papers also help prevent creases and ensure your artwork remains pristine as you complete your diamond painting project.
3) Mix and Match Colors
Don't be afraid to mix and match diamond colors from different kits if needed! Sometimes, you might decide to use colors that aren't included in your kit, and that's okay. As long as the colors fit the design, mixing can create stunning effects. If you want to stay true to the original, you can always order diamonds that match the DMC color codes.
4) Take Breaks
Diamond art is fun, but it's important to take breaks! Step away from your project every now and then to avoid eye strain and keep your creativity flowing. This will also prevent fatigue and ensure you're always working with fresh energy.
5) Choose Your Drill Type
For beginners, round drills are easier to work with since they're more forgiving if placed slightly off. However, square drills offer more detail and precision, creating a tighter, more polished finish. Experiment with both drill types and see which one you enjoy more!
You Did It! Your Diamond Painting Adventure Begins Here
Congratulations! You've now mastered the basics of diamond painting. Starting a diamond art project may have seemed daunting at first, but you rocked it with style and flair.

Remember, this is your journey, so let your imagination soar, embrace the happy accidents, and let the diamonds guide your artistic spirit. Whether you're a beginner or a seasoned pro, we've got the perfect kit to fuel your artistic passion. Don't wait another moment – grab your diamond painting kit now and let the journey begin!